Main articles: Start here Grove IoT Starter Kits Powered by AWS , Intel Edison
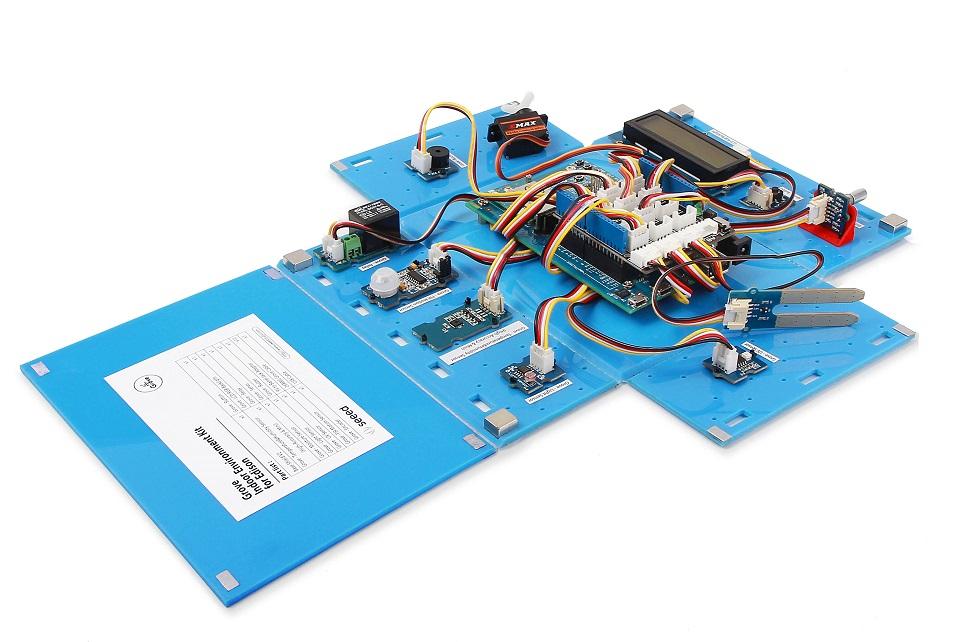
Designed for expert makers, entrepreneurs, and industrial IoT companies, the Intel Edison module provides easier prototyping with a fully open source hardware and software development environment. It supports Wi-Fi and BLE 4.0 connectivity. This kit contains eleven selective Grove sensors and actuators for you to track indoor environment as well as to create smart-house applications.

| Board/Part | Qty | Documentation |
|---|---|---|
| Intel® Edison for Arduino | 1 | Read Here |
| Base Shield | 1 | Read Here |
| Grove - Temperature&Humidity Sensor (High-Accuracy & Mini) | 1 | Read Here |
| Grove - Moisture Sensor | 1 | Read Here |
| Grove - Light Sensor | 1 | Read Here |
| Grove - UV Sensor | 1 | Read Here |
| Grove - PIR Motion Sensor | 1 | Read Here |
| Grove - Encoder | 1 | Read Here |
| Grove - Button | 1 | Read Here |
| Grove - LCD RGB Backlight | 1 | Read Here |
| Grove - Relay | 1 | Read Here |
| Grove - Servo | 1 | Read Here |
| Grove - Buzzer | 1 | Read Here |
| USB Cable; 480mm-Black | 1 | |
| USB Wall Power Supply | 1 |

At this section you can also refer to the Beagle Bone wiki for another way to create a thing and finish the left tasks. The difference is Beagle Bone didn’t use AWS CLI tool to Get Certifications.
Before you begin
Install AWS CLI
The AWS CLI is a way to manage your AWS services from your board. You need this first in order to download the SDK.
1.First, you need to install pip (Python package manager):
curl https://bootstrap.pypa.io/ez_setup.py -o - | python
easy_install pip
2.Next, install the AWS CLI with pip:
pip install awscli
Note: In order to view the help files ("aws iot help") you need to install Groff and a non-BusyBox version of less.
3.For Groff:
wget http://ftp.gnu.org/gnu/groff/groff-1.22.3.tar.gz
tar -zxvf groff-1.22.3.tar.gz
cd groff-1.22.3
./configure
make
make install
export PATH=$PATH:/usr/local/bin/
cd ~
4.For Less: First rename the old version of less
mv /usr/bin/less /usr/bin/less-OLD
Then install the new version of less
wget http://www.greenwoodsoftware.com/less/less-458.zip
unzip less-458.zip
cd less-458
chmod 777 *
./configure
make
make install
cd ~
5.To make sure everything has installed correctly, run the iot help file:
aws iot help
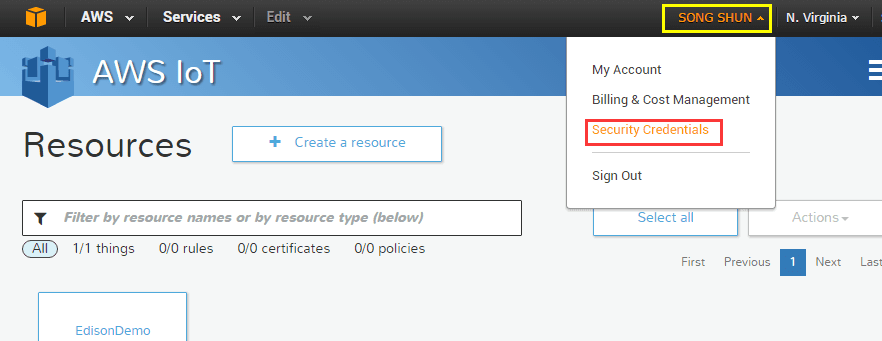
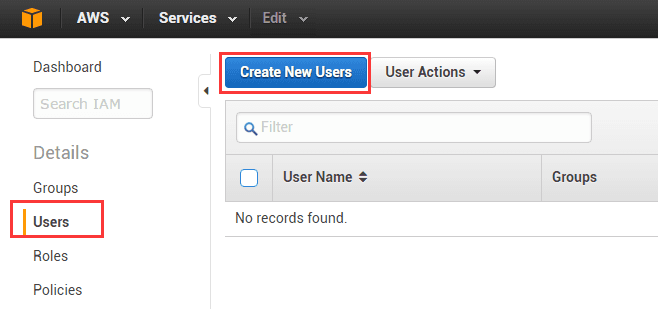
Get AWS credentials:
At this point, you should have AWS CLI installed. And the Access ID and Key you have download before, configure AWS and enter the ID and Key with:
aws configure


1.First create a folder to store your certificates in:
$ mkdir aws_certs
$ cd aws_certs
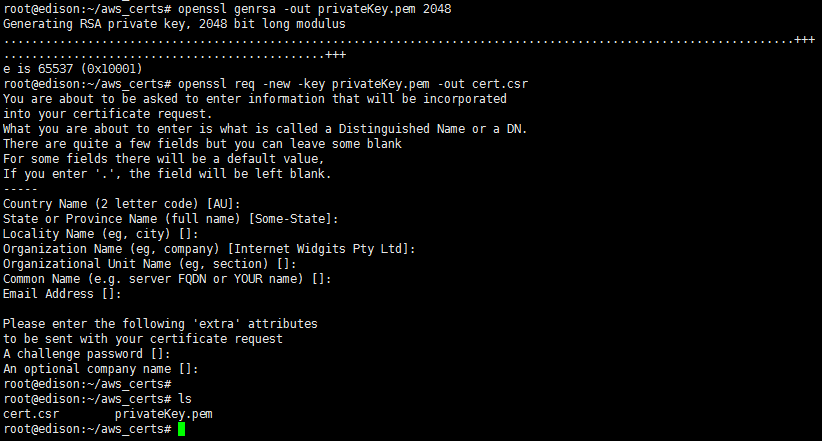
2.Generate a private key with open ssl:
openssl genrsa -out privateKey.pem 2048
openssl req -new -key privateKey.pem -out cert.csr
3.Fill out the fields with your info.
4.Run the following to activate the certificate:
aws iot create-certificate-from-csr --certificate-signing-request file://cert.csr --set-as-active > certOutput.txt
5.Run the following to save the certificate into a cert.pem file:
aws iot describe-certificate --certificate-id <certificate ID> --output text --query certificateDescription.certificatePem > cert.pem
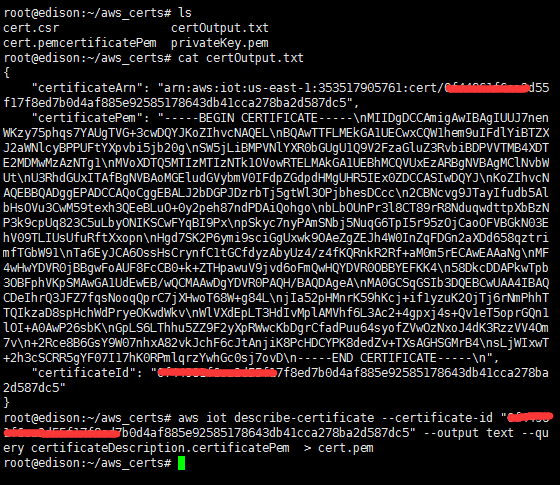
NOTE: Replace <certificate ID> with the ID stored in the "certificateId" field in certOutput.txt. To view the file enter: more certOutput.txt
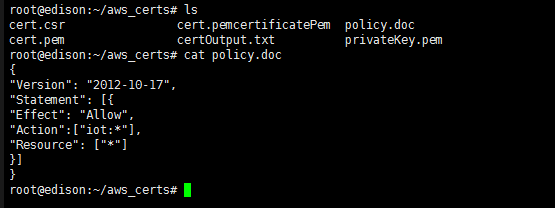
6.Create a Json policy document for AWS IoT SDK:
{
"Version": "2012-10-17",
"Statement": [{
"Effect": "Allow",
"Action":["iot:*"],
"Resource": ["*"]
}]
}
7.First enter:
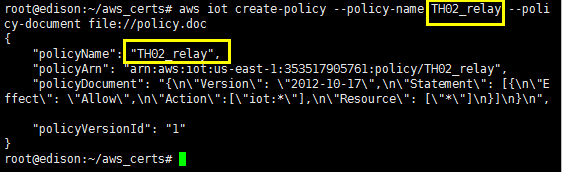
aws iot create-policy --policy-name PubSubToAnyTopic --policy-document file://policy.doc
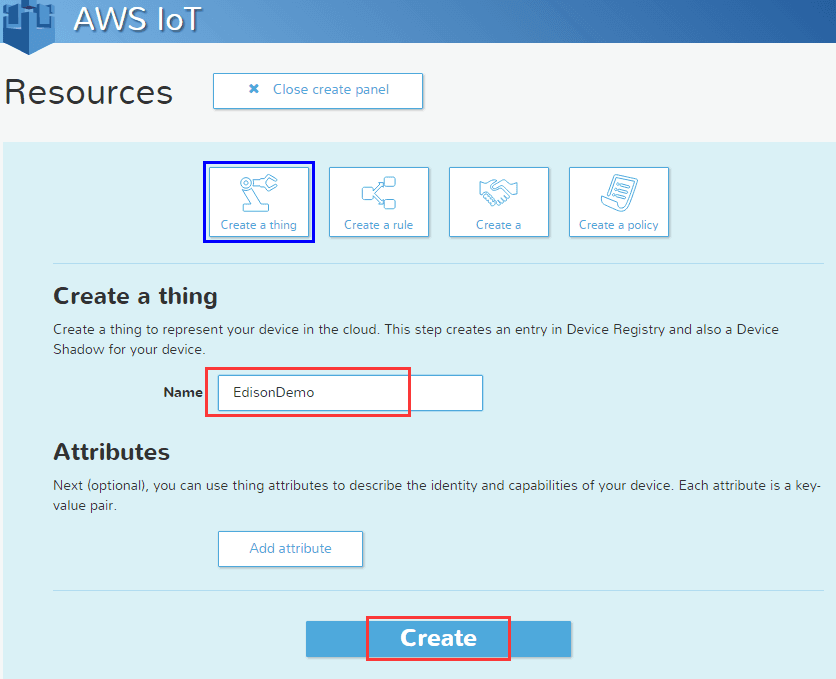
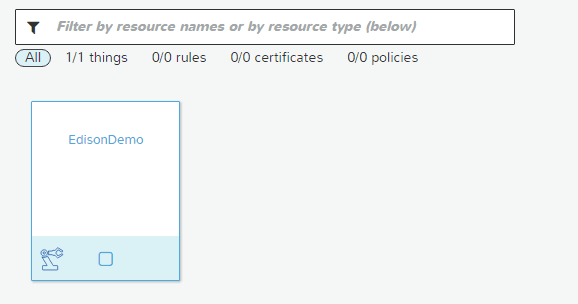
Notice:The policy name can be anything.
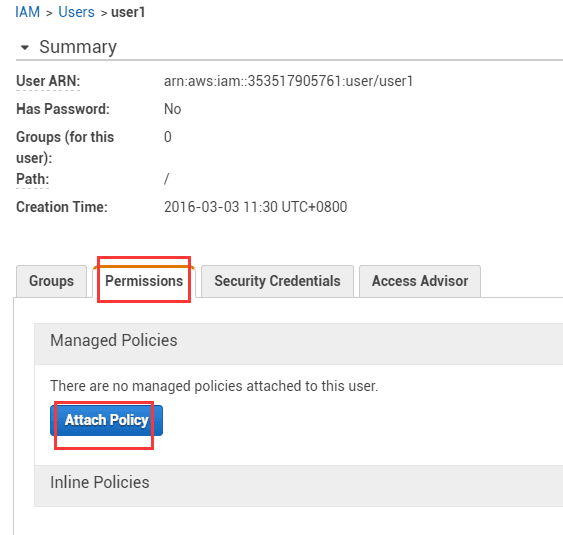
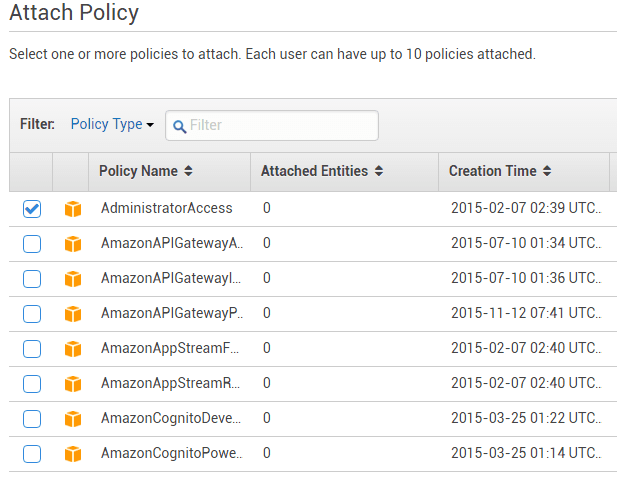
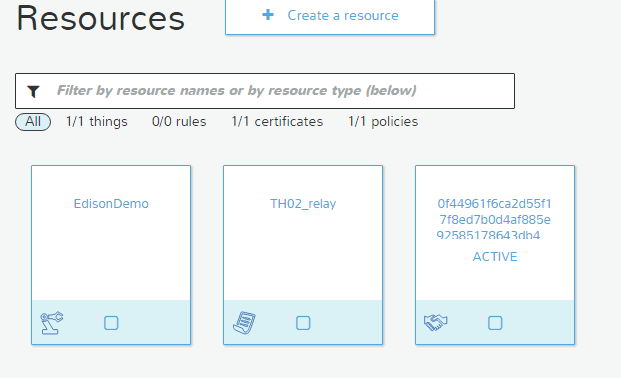
8.After that a policy and a certificate can be shown on your AWS console.
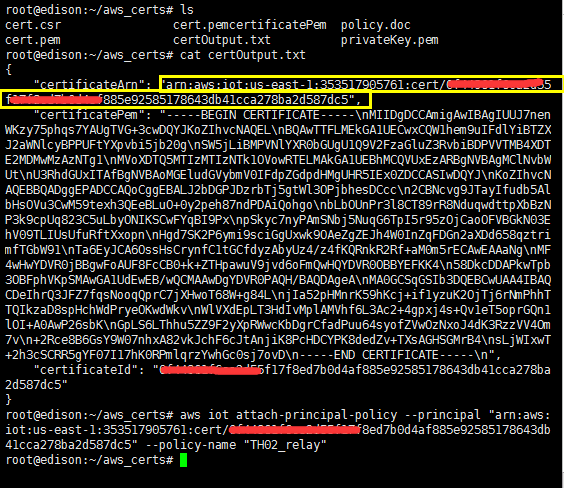
9.Then attach the policy to the certificate with:
aws iot attach-principal-policy --principal <principal arn> --policy-name "PubSubToAnyTopic"
NOTE: replace <principal arn> with the value stored in "certifcateArn" in the outputCert.txt file.
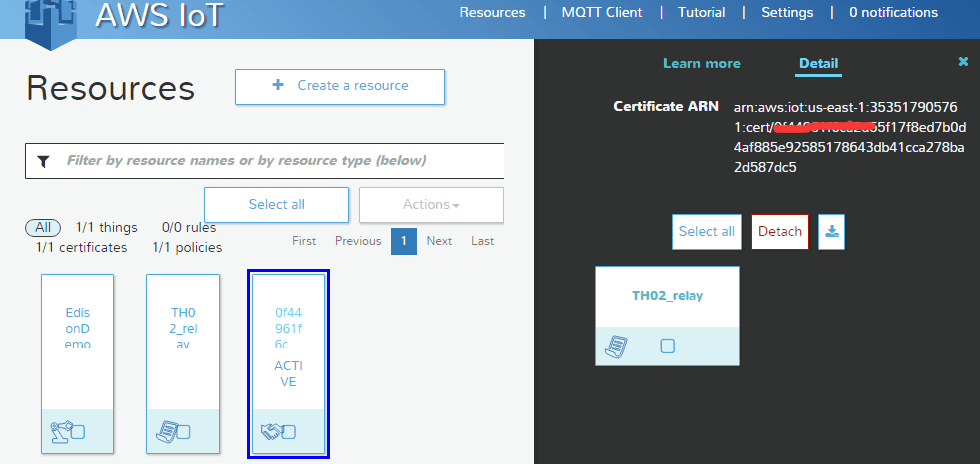
10.You should see your certificate has attach to your policy.
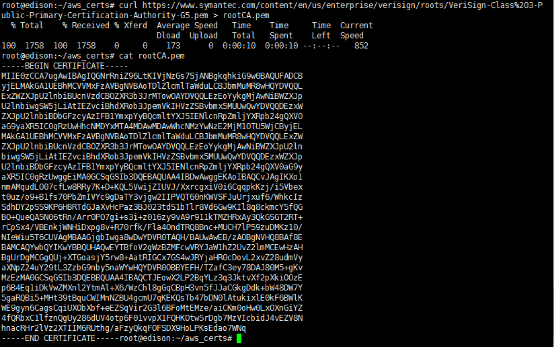
Use MQTT to subscribe and publish to AWS
curl https://www.symantec.com/content/en/us/enterprise/verisign/roots/VeriSign-Class%203-Public-Primary-Certification-Authority-G5.pem > rootCA.pem
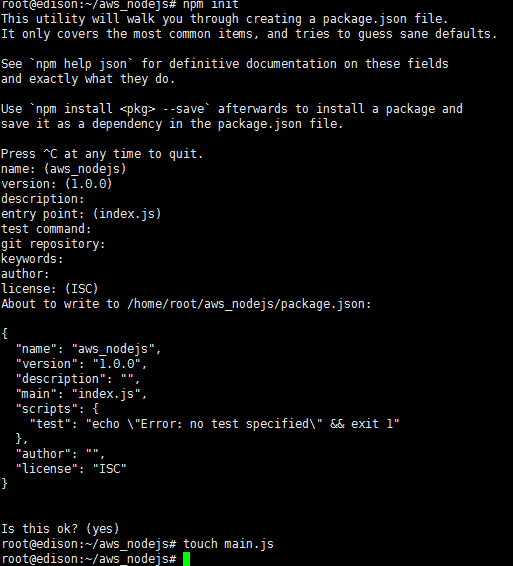
1.Create a nodejs project
cd ~
mkdir aws_nodejs && cd aws_nodejs
npm init
npm install --save aws-iot-device-sdk
touch main.js
2.Copy and save demo code to main.js
vi main.js
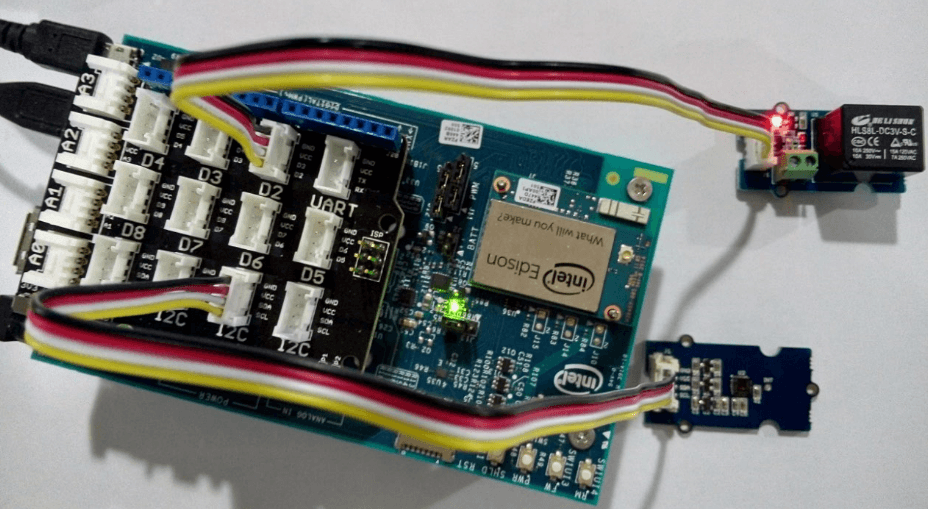
// Plug Grove - Relay to base shield port D2
// Plug Grove - Temperature&Huminity(High quality) to i2c port

var sensor1 = require('jsupm_th02');
var th02 = new sensor1.TH02();

var sensor2 = require('jsupm_grove');
var relay = new sensor2.GroveRelay(2);

// Simulate device value
var temp = 24.00;
var humi = 50;
var relayState = false;
var reported_state = {"Temperature":temp, "Humidity": humi, "RelayState": relayState};

//
// Client token value returned from thingShadows.update() operation//app deps
const thingShadow = require('./node_modules/aws-iot-device-sdk/thing');// Plug Grove - Relay to base shield port D2
// Plug Grove - Temperature&Huminity(High quality) to i2c port

var sensor1 = require('jsupm_th02');
var th02 = new sensor1.TH02();

var sensor2 = require('jsupm_grove');
var relay = new sensor2.GroveRelay(2);

var awsIot = require('aws-iot-device-sdk');

var thingShadows = awsIot.thingShadow({
    keyPath: '/home/root/aws_certs/privateKey.pem',
    certPath: '/home/root/aws_certs/cert.pem',
    caPath: '/home/root/aws_certs/rootCA.pem',
    clientId: 'myAwsClientId',
    region: 'us-east-1'
});

// Simulate device value
var temp = 24.00;
var humi = 50;
var relayState = false;

//
// Client token value returned from thingShadows.update() operation
//
var clientTokenUpdate;

var thingName = "EdisonDemo";
thingShadows.on('connect', function() {
    thingShadows.register(thingName);
    console.log(thingName + ' registering...');

    setInterval(function(){
      readSensor(sendData);
    }, 5000);
});

thingShadows.on('status', function(thingName, stat, clientToken, stateObject) {
    console.log('   received '+stat+' on '+thingName+': '+ JSON.stringify(stateObject));
    //
    // These events report the status of update(), get(), and delete()
    // calls.  The clientToken value associated with the event will have
    // the same value which was returned in an earlier call to get(),
    // update(), or delete().  Use status events to keep track of the
    // status of shadow operations.
    //
});

thingShadows.on('delta', function(thingName, stateObject) {
    console.log('    received delta on '+thingName+': '+ JSON.stringify(stateObject));

    if(stateObject.state.RelayState == true){
        relay.on();
        console.log('Relay is on.');
    }
    else if(stateObject.state.RelayState == false) {
        relay.off();
        console.log('Relay is off.');
    }
});

thingShadows.on('timeout', function(thingName, clientToken) {
    console.log('    received timeout on '+thingName + ' with token: '+ clientToken);
    //
    // In the event that a shadow operation times out, you'll receive
    // one of these events.  The clientToken value associated with the
    // event will have the same value which was returned in an earlier
    // call to get(), update(), or delete().
    //
});

function readSensor(callback){
    temp = th02.getTemperature();
    humi = th02.getHumidity();
    relayState = relay.isOn();

    callback();
};

function sendData(){
    var reported_state = {"Temperature":temp, "Humidity": humi, "RelayState": relayState};
    var relayTH02State = {"state":{desired: reported_state}};  // Use desired attribute can receive delta
    // More info refer to http://docs.aws.amazon.com/iot/latest/developerguide/thing-shadow-mqtt.html#update-pub-sub-message

    clientTokenUpdate = thingShadows.update(thingName, relayTH02State);

    if (clientTokenUpdate === null)
    {
       console.log('update shadow failed, operation still in progress');
    }
};
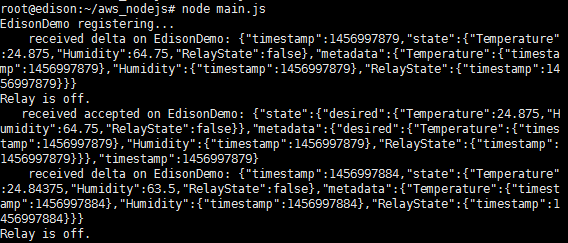
3.start nodejs application
node main.js
4.Watch data on AWS console
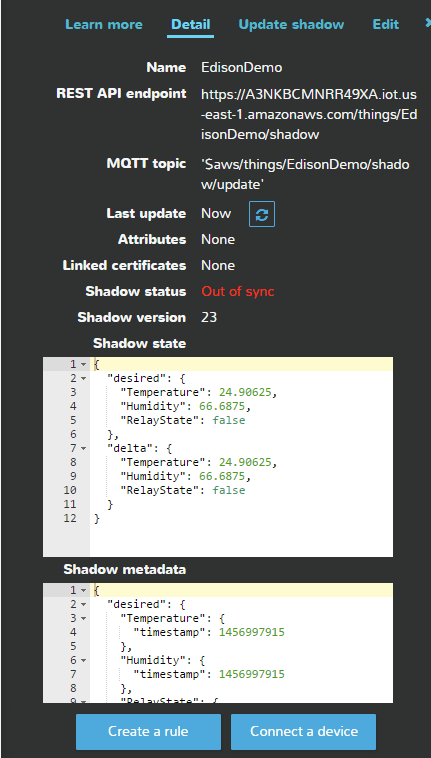
5.Update shadow to change relay state
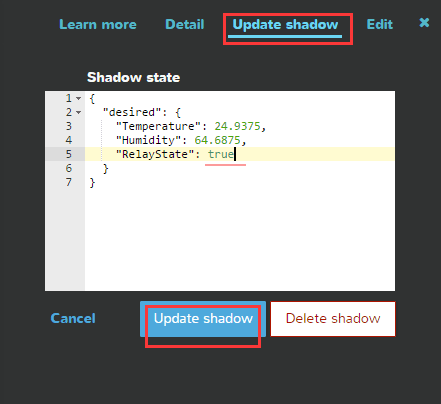
6.If uploading succeed Grove - Relay will turn on.
Copyright (c) 2008-2016 Seeed Development Limited (www.seeedstudio.com / www.seeed.cc)